-
Requirements
- PHP version 5 or greater
- WordPress 3.0 or greater
-
Getting Started
Downloading from Themeforest
Download the Positive theme and unzip this download. Any good quality zip program will do. Just follow the unzip instructions of your program carefully. Some give you the option of unzipping only a portion, or all, of the files. You want to select "all". Once unzipped, you will find the following folders will be in the unzipped directory:
positive/- the folder of the theme files that you need upload to /wp-content/themes/ folder on your serverdocumentation/- documentation files for current packagelicensing/- license for the themeresource/-sample skins/- importable skin filessample sliders/- importable slider filesplug-ins/- optional plug-ins which can be used with the themepsd/- all layered psd sources
change log/- Log files for the theme updates
Installation
To install this theme you must have a working version of WordPress already installed. For information in regard to installing the WordPress platform, please see the WordPress Codex - http://codex.wordpress.org/Installing_WordPress
When you are ready to install a theme, you must first upload the theme files and then activate the theme itself. The theme files can be uploaded in two ways:
- FTP Upload: Using your FTP program, upload the non-zipped theme folder into the /wp-content/themes/ folder on your server.
- WordPress Upload: Navigate to Appearance > Add New Themes > Upload. Go to browse, and select the zipped theme folder. Hit “Install Now” and the theme will be uploaded and installed.
Once the theme is uploaded, you need to activate it. Go to
Appearance>Themesand activate your chosen theme.-
Setting up the Homepage
To set up the homepage you must create a new page, you can do so by navigating to
Pages>Add New. You can give this page a title yet you do not have to include any content. Select the a template from the Page. Attributes section and click "Publish".Once you have created your new page, navigate to
Settings>Readingand configure theFront Page Displayssetting. Select the static page option and choose the page you just created as your front page.Your homepage is now created and can be viewed by visiting your root URL.
Or you can create a sample homepage with one click. Here is the video tutorial to create sample homepage via Configuration Wizard:
-
Setting up the Blog
A) Creating Main Blog Page
To set up the blog, you must create a new page, you can do so by navigating to
Pages>Add New. You can give this page a title of "blog" yet you do not have to include any content. Click "Publish".Once you have created your new page, navigate to
Settings>Readingand configure theFront Page Displayssetting. Select the static page option and choose the page you just created as your posts page.Your blog index is now created and can be viewed by visiting the page you just published.
Or you can create a sample blog page with one click via Configuration Wizard:

B) Inserting A Blog Post and Changing the Layout of the Main Blog Page
-
Setting up the Portfolio
There is 2 ways to create a portfolio page with Positive Theme.
A) By creating portfolio posts and porfolio category
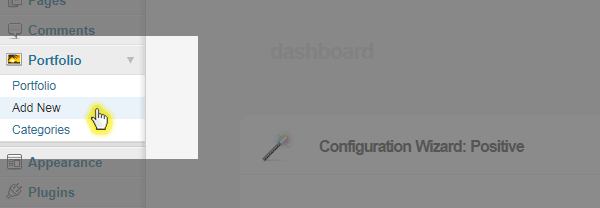
- First, you must create some portfolio posts, you can do so by navigating to
Portfolio>Add New - When creating your portfolio post please be sure to set a featured image for each of them. The image will be displayed as the thumbnail when the portfolio post being called via shortcode from any page.
- And take a look at the porfolio settings for each post from "Portfolio Options" metabox. You can insert a description or set what will happen when clicking the post (go to the post, display this post's featured image or video in the lightbox, call this post's content via ajax) or insert a video url.

- After creating the porfolio posts, you must create a new page, you can do so by navigating to
Pages>Add New. You can give this page a title of "portfolio". - And now you must use our
shortcode generator, which is coming with built-in the content editor of WordPress
- Click to portfolio tab in the shortcode generator, then set the height of the thumbnail images in the portfolio and other options, select a portfolio source:
- If you create a porfolio post you can select "From a porfolio category" - this source type will get all posts in the porfolio category which you select
- You must select "From selected posts" for getting the post, which selected by you, into the page.
- And finally click to
Generate The Portfolio Codebutton. You will have a shortcode like this:[portfolio from="a category" id="5" columns="3" limit="-1"]or[portfolio from="selected posts" id="19,15,17" columns="3" limit="-1"]
Video Tutorial For (A- Setting up the Portfolio by creating portfolio posts and porfolio category)
B) By WordPress galleries
- You must create some portfolio posts, you can do so by navigating to
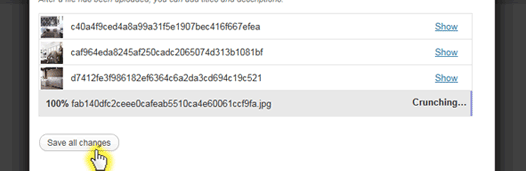
Portfolio>Add NewYou can give this page a title of "The post has a gallery" - And open the media uploader of WordPress. And upload your images via the uploader. Click to
Save All Changesbutton after being finished the uploading. And now you can sort the images. And finally close the uploader and "Publish" the post (The post has a gallery).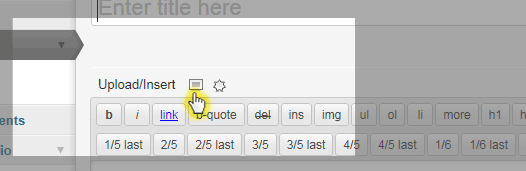
- Then you must create a new page, you can do so by navigating to
Pages>Add New. You can give this page a title of "portfolio". - Now you must use our
shortcode generator, which is coming with built-in the content editor of WordPress, to generate the portfolio shortcode. - Click to portfolio tab in the shortcode generator, then set the height of the thumbnail images in the portfolio and other options, select From A Post Gallery option for Portfolio's Source. And select the post, you just created and titled as The post has a gallery, for source page

- And finally click to
Generate The Portfolio Codebutton. You will have a shortcode like this:[portfolio from="a post gallery" id="5" columns="3" limit="-1"]
Video Tutorial For (B- Setting up the Portfolio by WordPress galleries)
- First, you must create some portfolio posts, you can do so by navigating to
Creating a slider and inserting into a page
A) Creating a new slider
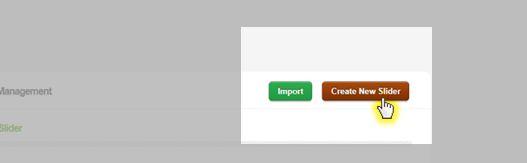
- Navigate to
Slider Managerand click toCreate New Sliderbutton - After giving your slider a title and selecting a slider type, click to
createbutton. - Now you can see all options for the slider. Set your slider options and click to
Update The Sliderbutton. - After the options being updated, you must add your slider items to the slider. You can do so by clicking to the slider's title from the root page of
Slider Manager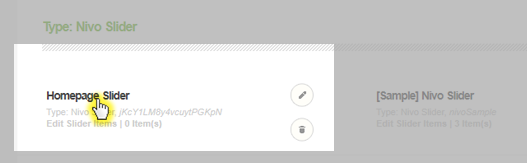
- And now click to
Add New Itembutton to add a item to the slider. And upload your image and set the slider item options.

B) Inserting a slider into a page (excepts "Header Sliders")
- Navigate to
Pages>Add Newor open an existing page inediting mode. - Now you must use our
shortcode generator, which is coming with built-in the content editor of WordPress, to insert the slider into the page via a shortcode. - Click to slider tab in the shortcode generator, select the slider you just created and click to
Generate The CodeButton. You will have a shortcode like this:
[slider id="XXXXXXXXXXX"]
C) Inserting a "header slider" into a page
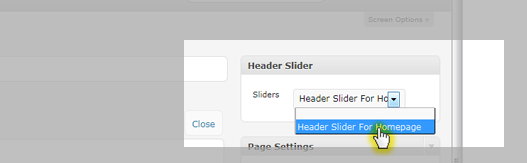
- Navigate to
Pages>Add Newor open an existing page inediting mode. - Now, select the slider from Header Slider metabox on the page.
- Important: Header sliders cannot embedded via a shortcode, only you have to select it from the metabox to display on a page's header area.
D) Video tutorial: Creating a slider with Slider Manager & Inserting into a page
- Navigate to
Custom Color Skins
A) Creating a new color skin
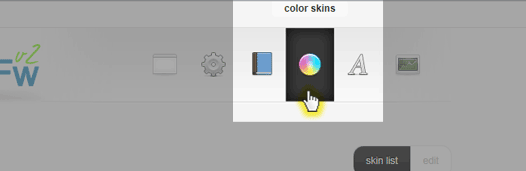
- Navigate to
CloudFw Paneland click toColor Skinbutton - Click to
createbutton and give a name for your custom color skin.
- Now you can see all color and layout options for the theme. Insert your colors and click to
SaveorSave & Applybutton. - Quick Tip: you can use
CTRL + S (win)andCMD + S (mac)shortcut to save the color skin when in editing mode.
B) Importing Predefined Color Skins
- You can find predefined custom skins
C) Finding a customizable element
- When in color skin editing mode, click to
Searchbutton. By the way, you can useCTRL + F (win)orCMD + F (mac)shortcut.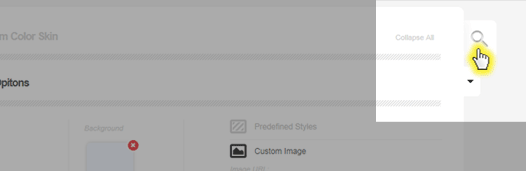
- You will see the searching form, insert the code or title of an element. Example:
Header BackgroundorHBG01
Please take a look at element title and codes
D) Code list of the customizable skin elements
BG01: Body BackgroundBG02: Body Head BackgroundLNK: General Link ElementsBRADIUS: Global Border Radius LevelHBG01: Header BackgroundHLINK: Link Elements in the HeaderHTEXT: Text colors in the HeaderNAVSTYLE: Style of the Navigation MenuNAVBG: Navigation Line BackgroundNAVLNK: Navigation Links (for only 1st Level)NAVSHADOW: Navigation Line ShadowsNAVARROW: Current Navigation Menu Indicator (Arrow)DDOWNBG: Navigation Menu Drop Down BackgroundDDOWNLINK: Navigation Menu Drop Down Links (for 2nd, 3rd.. Levels)HOMEICON: Home Icon Colors in The Header LineMDBG: Middle Area Background (Between the Navigation Menu and the Content Area)MDHEIGHT: Middle Area HeightBLURB: Blurb Text ColorsBREADCRUMBLE: BreadCrubmle Text ColorsCONTEXT: Content Texts and Heading Colors (h1, h2 .. h6)PORTOVERLAY: Overlay Colors of Portfolio PostsSBWIDGET: Widget Title and Text Colors for the Left and Right Sidebar AreasSBLINK: Link Colors for the Left and Right Sidebar AreasFTWIDGET: Widget Title and Text Colors for the Footer Sidebar AreasFTLINK: Link Colors for the Footer Sidebar AreasCSS: Additional CSS Code
- Navigate to
-
How-to
-
Set Featured Image
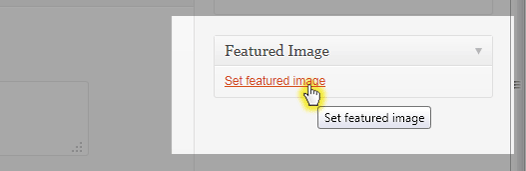
- Navigate to
Pages>Add Newor open an existing post inediting mode. - Locate the
Featured Image moduleand click the Set featured image link. - You will see an uploading screen identical to that used when inserting an image into a post or page. Follow the on-screen prompts to choose the image from your computer and upload it or choose it from one of the images already in your Media Library.
- Once the image has successfully been uploaded, look underneath the sizing options, and click on the Use as featured image link.

- Your Feature image is now set! You can close the Media selector once you’ve chosen the featured image. The image will then appear wherever a featured image is available.
- Navigate to
-
Activate Custom Login Module
-
Setup Typography Options
-